
Parameter Setup
Parameter allows you define on which kind of transactions you want to activate this functionality against. Based on the checkbox selection, work location field will be enabled on the respective forms, allowing users to enter the work location details.
Go to Project management and accounting > Setup > projects360 Parameter > Timesheets tab
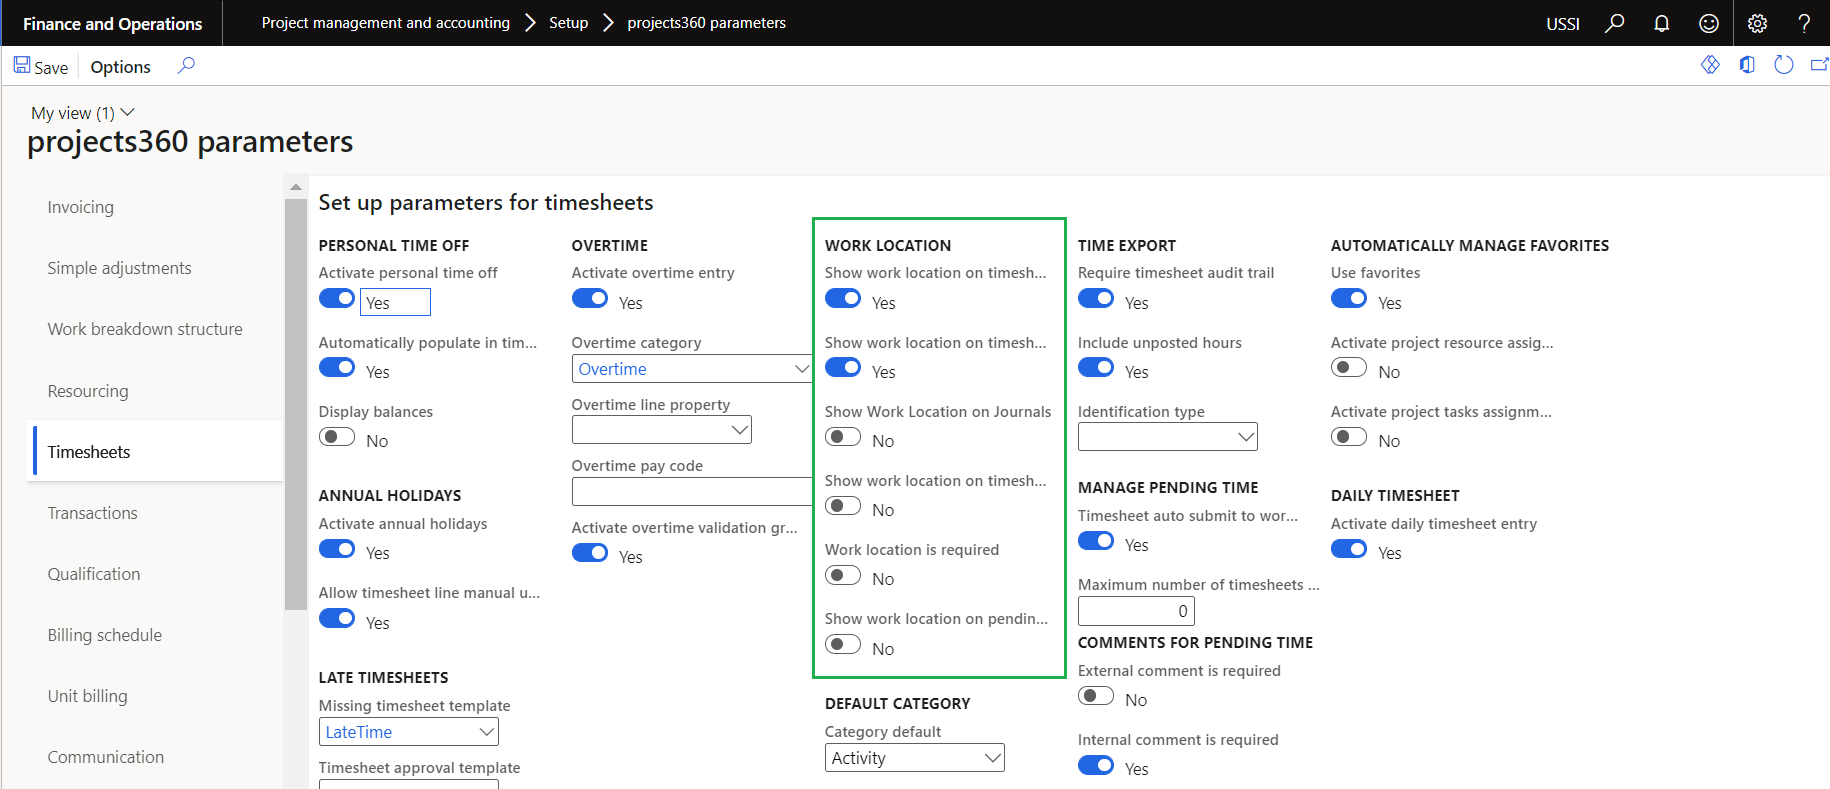
Below are parameters that have been added for this feature.
| Fields | Description |
| Show work location on timesheet lines | When the user chooses Yes in this check box, the Work locations ID field is displayed on the timesheets next to the project name. |
| Show work location on timesheet transactions | When the user chooses Yes in this check box, the work location field will be displayed on the timesheet line detail section. |
| Show Work Location on Journals | When the user chooses Yes in this check box, the work location field will be displayed on the Hour and Beginning balance journals. |
| Show Work Location on timesheet mobile app | When the user chooses Yes in this check box, the work location field will be displayed on the timesheet open through mobile app. |
| Work location is required | When the user chooses Yes in this check box, it is required that the user enters the details in this field. |
| Show Work Location on manage pending time | When the user chooses Yes in this check box, the work location field will be displayed on the manage pending time. |
 |
Note – When both parameters (2 and 3) are turned on, then the system defaults the work location from the line defaults to the transaction level and the user can then change if required. |
Work Location Setup
New form has been introduced for this feature to allow users to setup the work location ID. The form is known “Work Location” and it is available in below navigation.
Project management and accounting > projects360 setups > Work Location
Go to Timesheets > Setup > Work Location

The form contains the following fields:
- Work location id – Text field where the user can enter the work location ID. Once the user enters the ID and tabs out of the field, the user cannot edit the field.
- Location name – Editable field, where the user can enter the location name and will be allowed to edit even after saving the record.
- Location – This is a drop-down field with the following values in it:
- Home
- Office
- Project
- Custom – When the user chooses this option then the user must enter the address in the address button. In case the user does not enter the address then the user will not be allowed to exit the record and an error message “Enter the address for the location – Custom” is displayed, forcing the user to enter the address.

Address Fast Tab – This tab is enabled when the Location is set to custom. The user can enter an address as in the standard address form in AX7.0.

Based on the location defined the location ID is being picked from standard address tables as displayed in the following screenshots:
Home – Worker’s employee record primary address. When the ‘Private’ checked box is turned on the address only Country, State and City will be displayed on work location address.

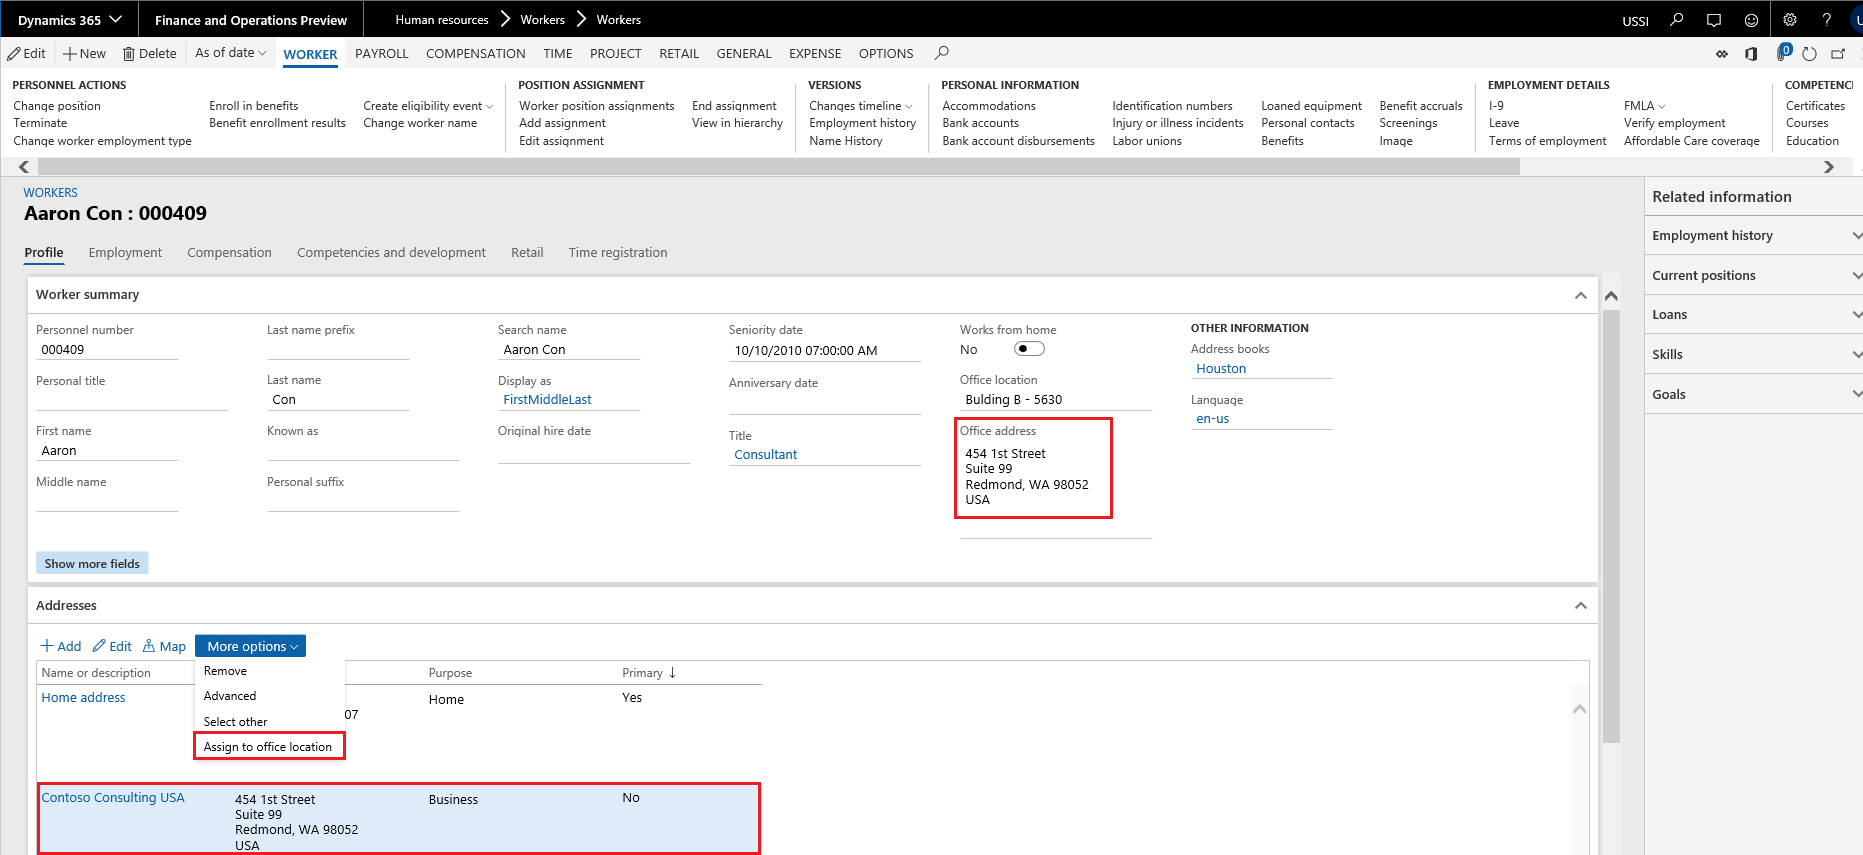
Office – Worker’s employee record office location (link on employment record). To link the office location, Select the address and click on button ‘More options > Assign to office location’. When the ‘Private’ checked box is turned on the address only Country, State and City will be displayed on work location address.
Project – Project address defined on the selected project.

Custom – Address entered in the new Work Location form, for location type custom.
Setup – Assign Work Locations
This is a new form introduced for the user to select the work locations that can be allowed for the project. Thus, when the user selects this project on the timesheet, only those work locations entered or selected in this form are displayed.
However, if the user leaves this form blank then all the work locations will be displayed in the drop down on the timesheet. Assign work locations form will be available in the Validation group, as shown in the below screenshot on the All Projects list page.

There is also an option to mark the default work location so that there is a default value of work location on the timesheet line or at the transaction level.
The form contains two tabs:

Overview Tab – Where the information of all the selected work locations will be visible to the user. This tab contains the following fields:
- Work location id – field where all the selected work location ID’s selected under the work location tab is displayed.
- Work location name – field where all the selected work location name selected under the work location tab is displayed.
- Default – shows the record that is default onto timesheets, for this project.
- Set default button- using which the user can setup a default work location ID, to default onto timesheets.
- Clear default- To clear the default option on the form. The timesheet will show a blank work location ID by default, and the lookup will display all the selected work location records selected in the Work location tab.

Work Location Tab – Shows all the work location available. It has two sections as defined below.
- Remaining work locations – where the list of all work locations that have not yet been selected and moved over to the Selected work locations is available.
- Selected work locations – where the list of work locations that have been selected from the remaining work location is stored.
Two arrow buttons for the selection and de-selection of records and move records between the sections.