
A new form has been added for a timesheet user to book time with as minimum data as possible and to update later when it is being transferred to actual timesheets in Microsoft Dynamics 365 for Finance and Operations.
In this form the user will have all the projects that have been setup as favorites available on the left hand side and there will be a generic node called “Unassigned project” which has the sub-node as “Unassigned category/Unassigned task”. The user can create pending lines under any of the nodes, so that the values on the nodes will default onto the pending line created.
The user updates the project name and other details in a line that is under the unassigned node, and it will appear as a new node, upon save/refresh. Such lines can then be added as favorites using the manage favorites button. On this form after the records are updated completely with all of the required information to create a timesheet, the user can transfer lines to timesheet.
There is an option to import all the meetings from an outlook calendar, excluding meetings/events that are marked as personal and all-day events.
Keep reading this article to explore the capabilities of this form.
Manage Pending Time
This form can be accessed following the below path:
Go to Project management and accounting > projects360 > Timesheets > Manage pending time
Go to Timesheets > My timesheets > Manage pending time

There are two sections on this form. The left hand side represents the projects, activities and categories in tree format, whereas the right hand side is again divided into two sections involving header and line details respectively.
Tree Section
On top of the left hand side of the form, the filters are available and tree of the time entered. This tree is built depending on the data that is being saved on the right hand side of the form. When the form is opened for the first time, only the unassigned project node will be available. However, if there are any timesheet favorites for the logged in User/Employee, then those favorites also will appear as nodes on the tree. The fields on the tree as follows:
| Field: First level of tree | Description |
| Projects | Root Node. It is always Projects as the text. Collapsing this node will collapse the entire tree. |
| Field: Second level of tree | Description |
| Project name | The project name is displayed, when no project is selected it is displayed as Unassigned Project. |
| Legal entity | Legal entity of the project is displayed next to the project name when the project is selected. |
| Project ID | Project ID of the project is displayed next to the legal entity when the project is selected. |
| Field: Third level of tree | Description. |
| Category name | Category name is displayed if the same is selected on the line. When there is no selection the same appears as “Unassigned category”. |
| Activity name | Activity name is displayed if it is selected on the line. When there is no selection, it appears as “Unassigned task”. |
Data can be filtered on this section using the filters provided. Details are as follows:
| Filters | Description. |
| Project | Filter/search records for the Project name. |
| Category/Activity | Filter/search can be either for the category name or activity name. |
The right hand section of the form is divided into header and line section.
Header section – General
In the header section the employees can add or remove lines to book their time. The timesheet user can either enter the time manually or use the Timer functionality available – Start timer – Captures the real time spent on the task. The time captured by the timer can be edited by the employee by using the Edit timer option. The fields available in this section are as follows:
| Field | Description |
| Date | Date on which the time has been spent. |
| Hours | Number of hours spent on the task manually entered by the employee. |
| Timer Hours | Not editable field. Data populates in this field when the Start and stop timer is used. The time is calculated between the click of start and stop timer. |
| Internal comments | Internal comments, entered by the employee. |
| External comments | Comments, entered by the employee. |
| Project name | Name of the project is displayed in this field. This is a read only field. |
Buttons available on this section are as follows:
| Buttons | Description |
| Add | Click to add new lines in the form. |
| Remove | Click to remove lines from this form. |
| Start timer | Click on this button to start the timer and timer will start tracking time. Once the task is over, the same button now appears as Stop timer. More details on this functionality is here. |
| Edit timer | When the user clicks on this button, a new form opens where the user can see the captured time hours. |
| Assign lines to favorites | When the user clicks on this button a new form is opened, – “Assign lines to favorites” which allows the timesheet user to quickly update the unassigned lines with the projects and details that have been added as favorites. More details on this functionality in sections below. |
| Transfer to timesheets | The selected line or lines will be transferred to timesheet provided all the required fields are available for the creation of a timesheet. Once the record is transferred to timesheet, it disappears from this form. When there is missing information, it is displayed as an error messages and the timesheet is not created until the form is updated. |
Line Section – Details
In this section, the details of each line is available such as the project ID, category ID and activity details. Users can key-in the details for selected line in this section. The fields available on this section are:
| Field | Description |
| Entity | Entity ID lookup. |
| Entity name | Field is not editable. Based on the entity selected in the above field the information is populated. |
| Project | Project ID lookup displaying the projects available in the selected legal entity. |
| Project name | Displays the project name. Field is not editable. |
| Activity | Activity lookup, displaying all the activities for the selected project. |
| Activity name | Displays the activity name. Field is not editable. |
| Category | Category id look up. |
| Category name | Displays the category name. Field is not editable. |
| Work location | Work location lookup, if this feature is turned on. |
| Work location name | Displayed the work location name. Field is not editable. |
| Internal comments | Editable field, defaults what has been entered at the header level. |
| External comments | Editable field, defaults what has been entered at the header level. |
The employee/user enters data in this form and then when all the relevant information is updated, use the buttons on the top of this form to perform further actions. Buttons available on action pane are as follows:
| Buttons | Description |
| Save | Saves records on the form. |
| Import calendar appointments | Allows users to import the calendar appointments from Outlook (Office 365). More details on this functionality can viewed here. |
| Manage Favorites | Provides ability to define the favorites from the projects available on the tree. More details on this functionality can viewed here. |
| Transfer all to timesheets | Transfers all nodes and its lines into timesheets. Where there are lines with required fields not updated, nothing is transferred to timesheets and the message detail displays the details for the transfer being unsuccessful. |
| My timesheets | Allows to open ‘My Timesheets’ form where user can see all the timesheets created with the employee associated with the user. |
Some of the sub-functionalities available in this feature are as follows:
Capture time using Timer
Timer button is provided on the header section to precisely track the time spent on an activity. To use this functionality, users have to add a new line or select an existing line and start the timer. Before starting, the timer button will appear in a start state (green color) and once its starts running will be represented stop state (red color).
There is fact-box available on the form to display the details for the currently running timer or the previous run details. This fact box has been introduced so that the user can continue to use manage pending time form, but also monitor the time ticking against the line in which the timer is runner. Users can stop the timer from the fact-box also.
Start timer button available on the selected line. Before starting the timer, timer button will look like as shown in below screenshot:

Once the timer is running against the selected line, timer button will look something like as shown in below screenshot:

Below visual showing the fact-box details of the current or previous timer run.

Also, there is an edit timer button available on this form to review the details. This button will be disabled while timer is running. Edit timer helps in reviewing and managing the captured hours. Each run is stored in separate line enabling users to review and confirm timer usage. There could be possibilities that the users have accidentally started the timer or didn’t stop it at the right time. In these cases edit timer helps in manually editing the lines to reflect the accurate hours.
The hours captured through the timer run are stored on the ‘Timer hours’ column. This column shows data in HH:MM format and is converted into key-able format which the timesheet form accepts (but this is just an approximation). Once hours are captured using timer, users have to manually enter the reciprocal time into the hours column before transferring the line to timesheet.


Import from Outlook (Office 365)
Manage pending time feature provides ability to import calendar appointments from Outlook (Office 365) account. In order to use this functionality, a system administrator needs to set exchange web services URL on the Microsoft Exchange Server parameters (Organization administration > Setup > Microsoft Exchange Server synchronization > Microsoft Exchange Server parameters) form.
Once the user hits the ‘Import calendar appointments’, a new form opens up to facilitate this process. On this new form users have to select\define period and calendar for which the data needs to imported. For period selection, current week, previous week and date range options are available. Once the user selects current or previous week option, From date and To dates are auto filled based on the system date. For date range option, user has to enter in the dates.

Once imported, users will be able to assign details like project and activity. Multi-select and assign favorites are available to expedite the process using the ‘Assign lines to favorites’ button.

Manage Favorites
This function provides the ability to define new favorites or remove an existing favorite for the logged in user. Once the user clicks on ‘Manage favorites’ button, a new slide form opens. This slide out form displays favorites assigned to the logged in user individually or as a group, and all the lines on the tree (provided lines have project, activity and category defined).
Records that are already saved as favorites will have this checkbox enabled against them. From this window, the user can mark or un-mark the line as favorite or remove it as favorite respectively. Remove from favorite action can be performed only on the individual favorites and not on the group or all favorites.


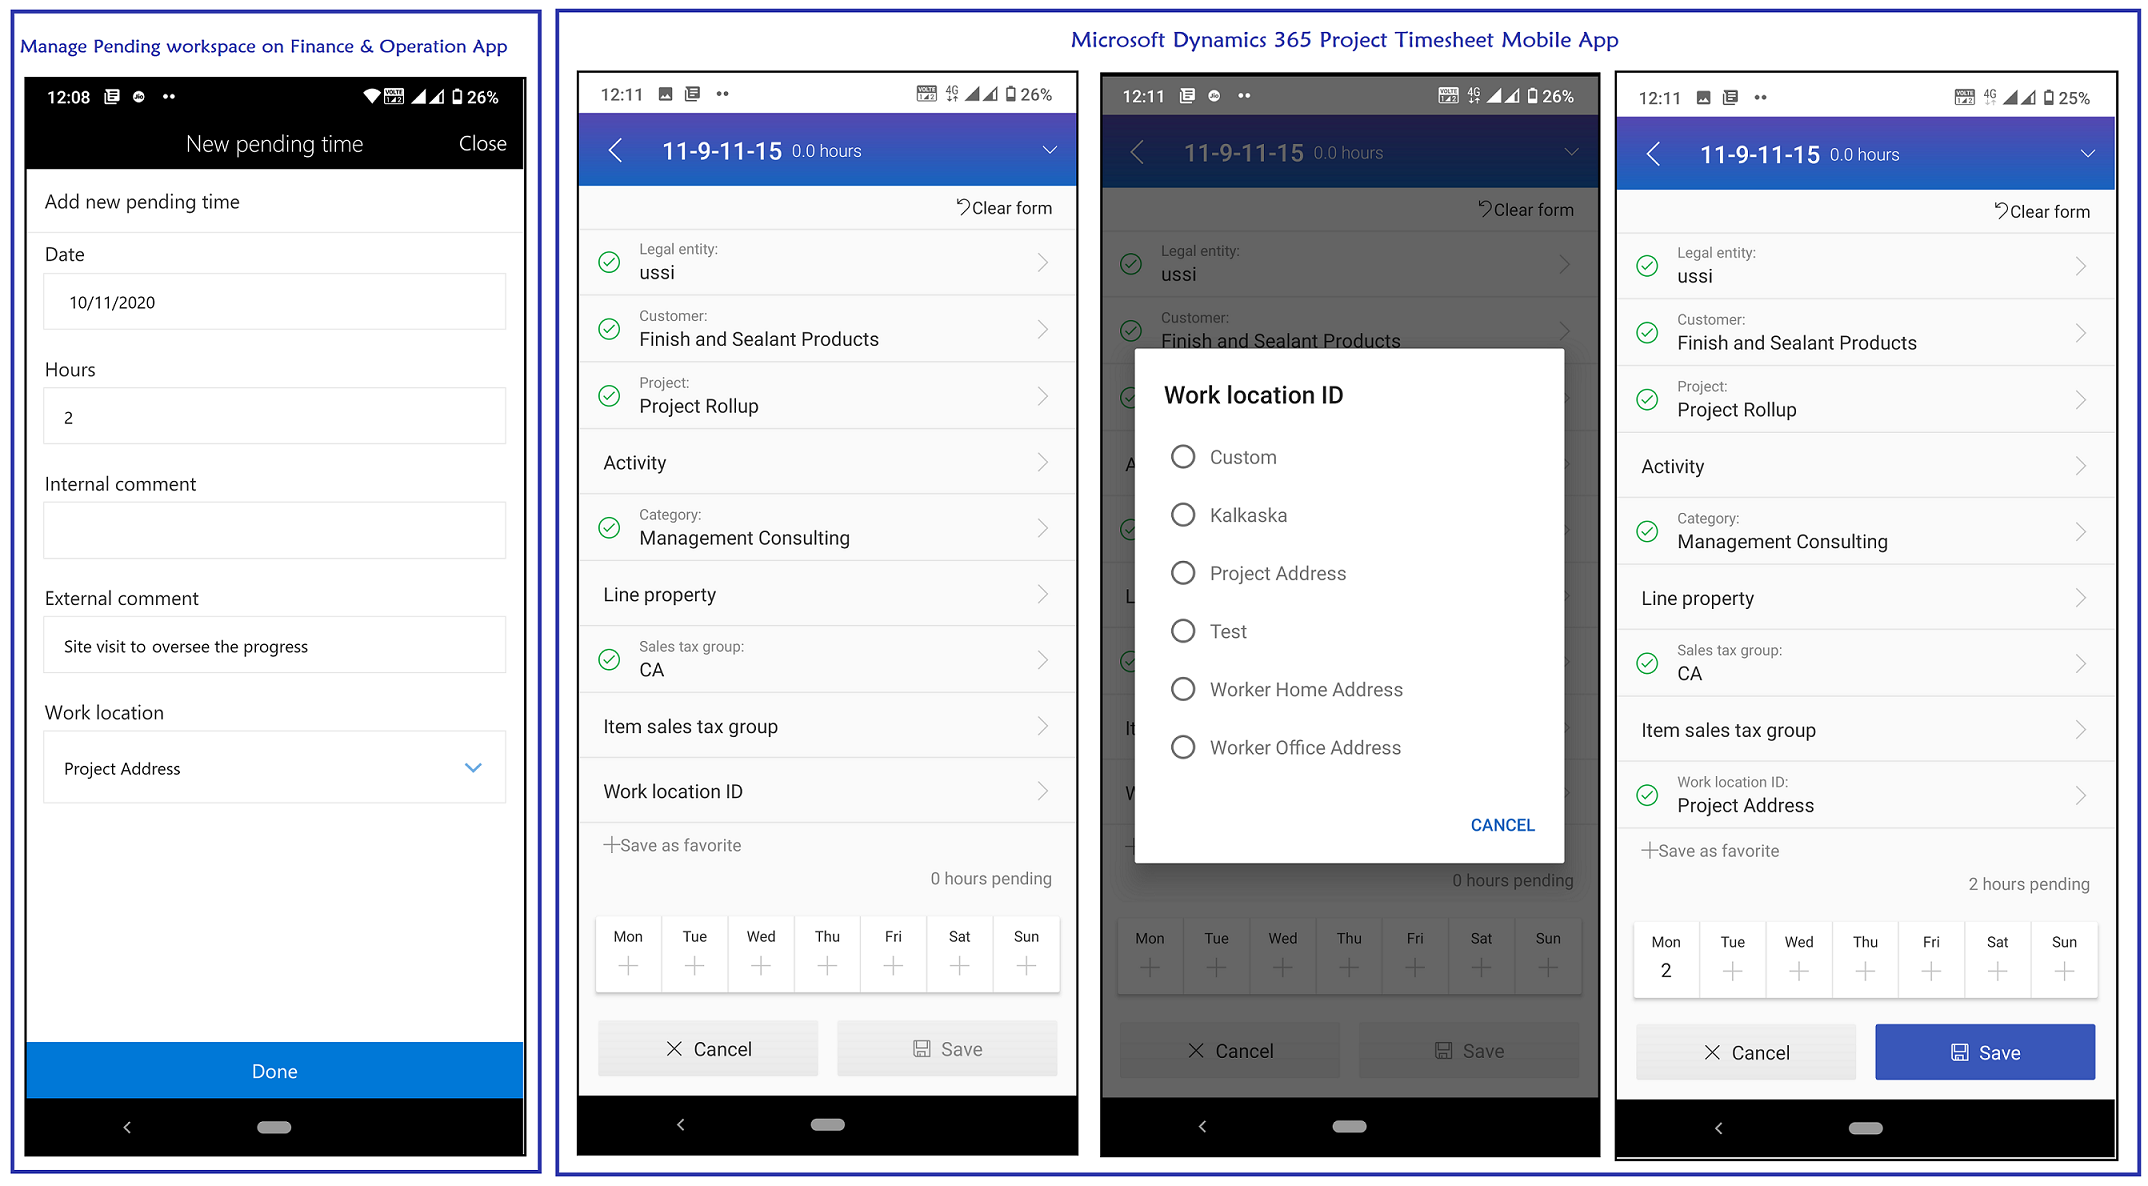
Mobile app
A simplified mobile workspace is provided to capture the time while you’re on the go. Time is entered on the mobile app and reflected on the pending time form.
Import from Excel or Microsoft Flow
Users can record time in an Excel workbook and import the hours into the Pending time form periodically. The corresponding Data entity used for the Excel import also allows for other integration scenarios, such as a Microsoft Flow process.