
Timesheet entry
Entering time is simple—just describe what you worked on and when, using natural language. There’s no strict format. The agent will interpret your prompt and match it to the right project based on the details you provide.
Adding more project information—such as the project name, phase, or main project—helps the agent find the correct match. If you include keywords like activity, category, or description, the agent can enrich your entry with additional details like comments or classifications.
Examples without keywords:• “Worked 4 hours on civic plaza center yesterday—log that under temporary works.”
→ The agent uses civic plaza center and temporary works as project details.
• “Log 8 hours for mon and tue on civic plaza center under temporary works – activity: design, description: reviewing drawings prior to submission.”
→ The agent uses key words activity and description to populate the additional information needed for your time entry.
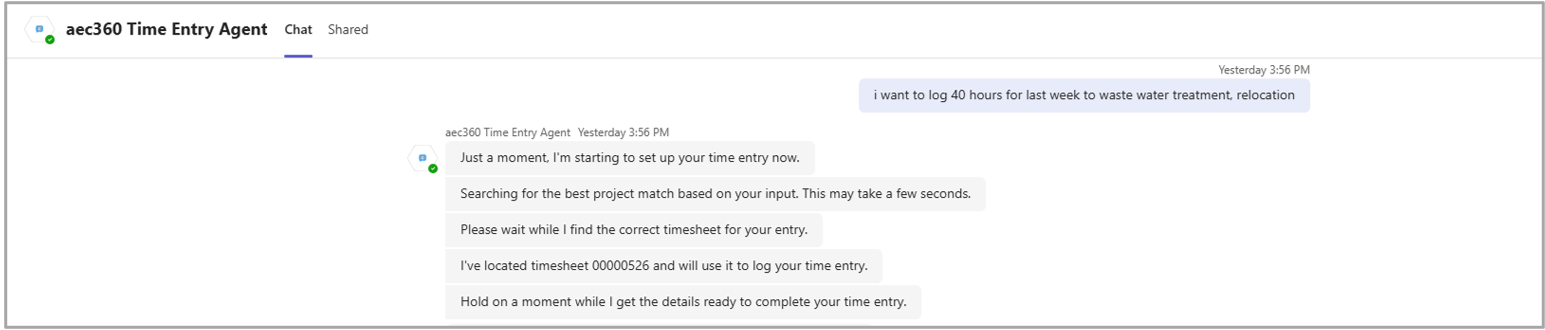
After you give your time entry prompt, the agent confirms it’s processing the request and shows what it understood. The agent then checks if a timesheet exists for the relevant week and creates one if needed.
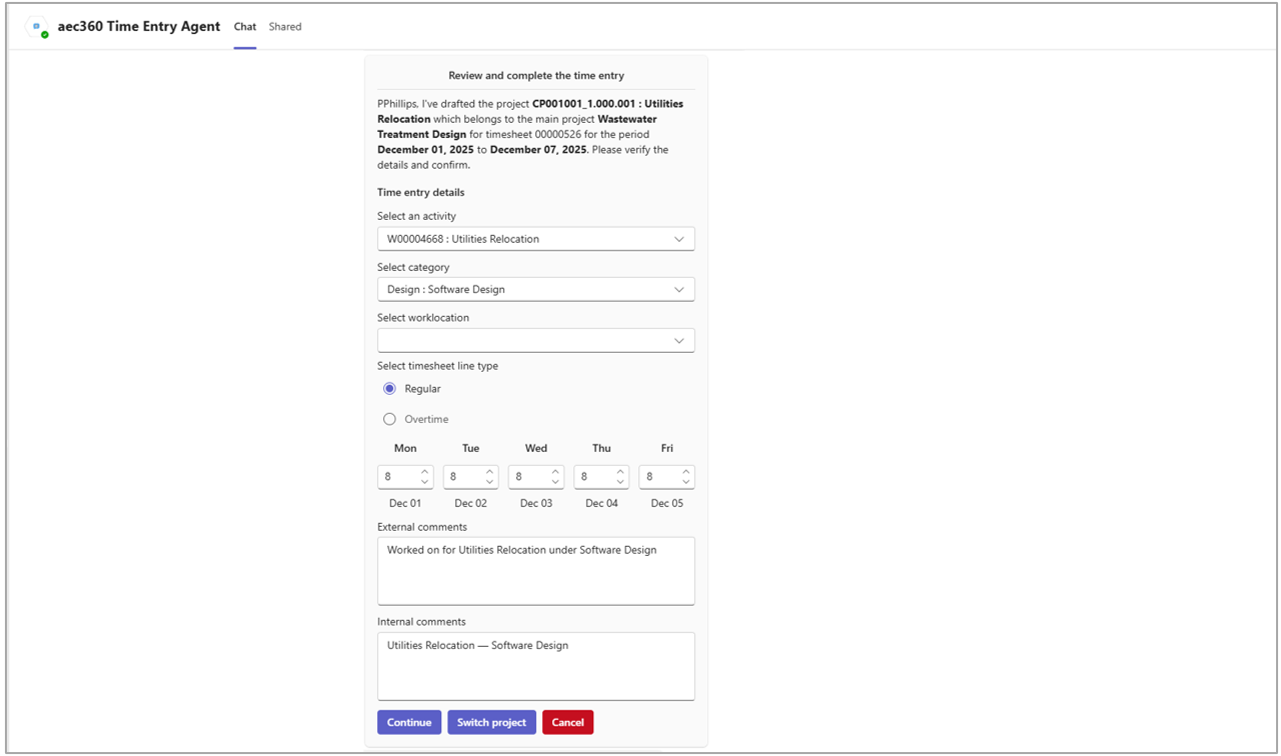
The agent then presents a completed time entry based on the details it interpreted from your prompt. It provides details of the project, daily hours and comments are already filled in, giving you a clear view of how your time has been allocated. You can choose whether the time should be logged as Regular or Overtime, depending on how the work was performed. If everything looks correct, select Continue to complete your entry.
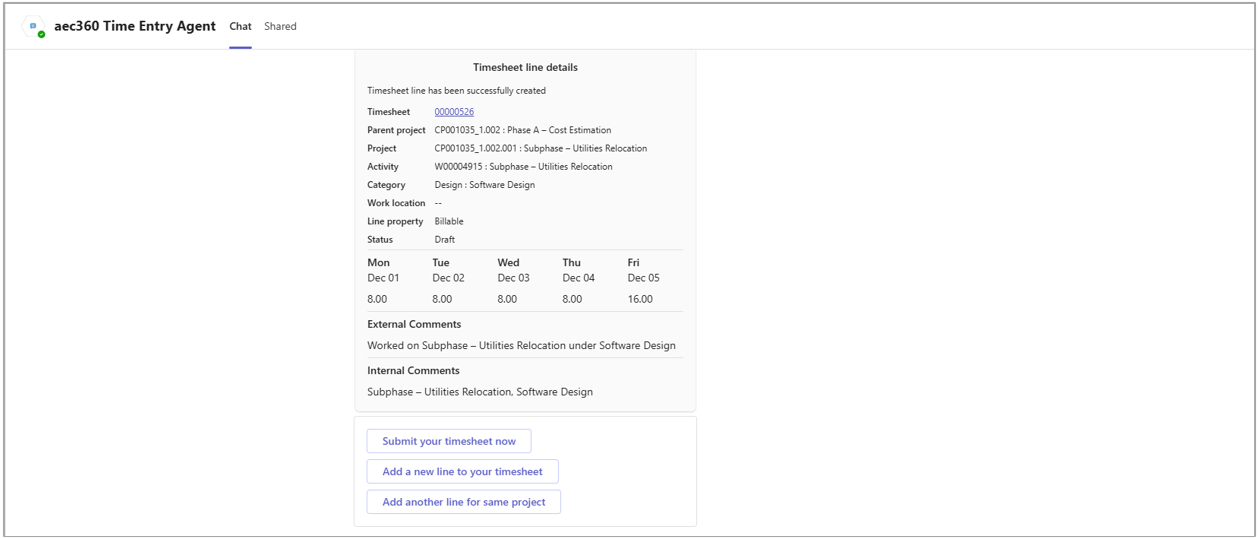
Once the agent has processed your time entry, it will display a summary of the completed timesheet, along with a link to open the timesheet in the system if needed. You will also be presented with helpful options such as submitting your timesheet for approval or creating another entry, making it easy to proceed with your next time entry task efficiently.